Section Topics
Viewing and Printing Reports for Contacts
You can view and print contact reports from any list of contacts. You can also access reports from the company and person overview pages.
- Selecting the Contacts to Include
- View or Print a Contact Report from a List of Contacts
- View or Print a Contact Report from the Contact Overview Page
- Print All the Profiles for a Specific Contact
- Print All Phones and Addresses for a Specific Contact
In addition to contact reports, you can also print information for a single contact from the profiles and view contact dialog boxes.
Selecting the Contacts to Include
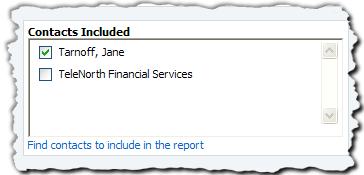
You have a few options when selecting the contacts to include in a report. Choose an option in the Contacts Included section of the Report Chooser dialog box:
- The current (highlighted) contact
- The marked contacts (if you have contacts marked)
- All contacts in the current list
- The associated company for the person (when printing a report for a single person contact)
-
None of the above
In this case, choose Find a different contact to find a different contact for the report.
The figure below illustrates the second option; in this case, the report is printed for the four contacts that have been checked in the list.
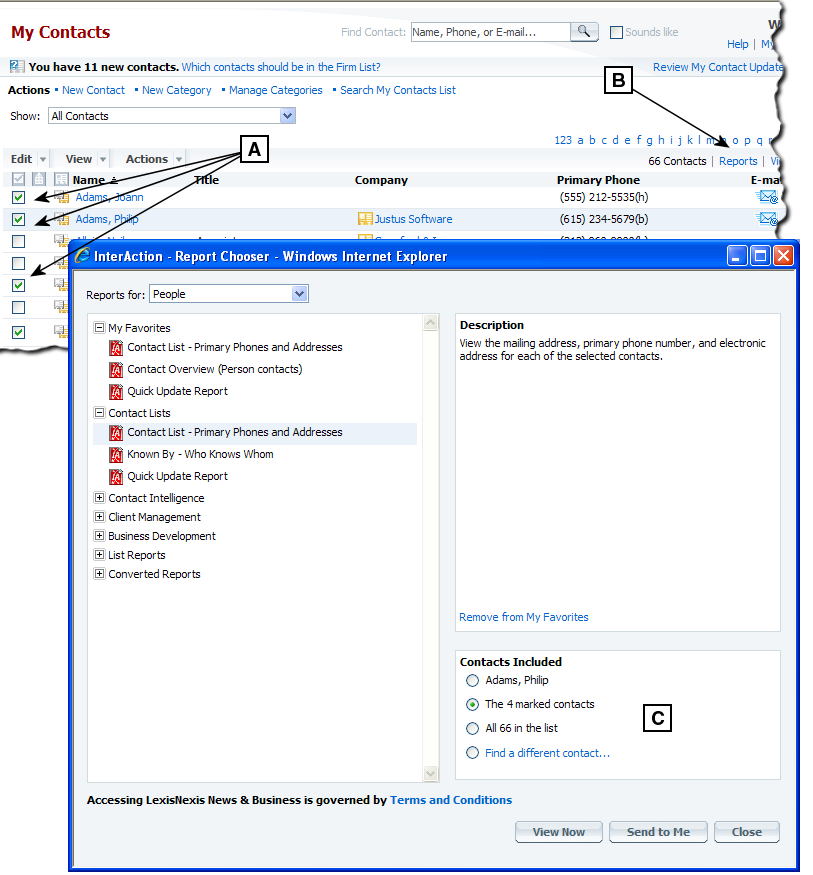
Viewing a Contact Report for a Selected Set of Contacts
[A] Select a subset of contacts in this list to include in the report by selecting the check boxes.
[B] Choose the Reports link (or View > Reports).
[C] Change the Contacts Included option if necessary, then choose View Now to see your report.
View or Print a Contact Report from a List of Contacts
-
Open any list of contacts.
There are several ways to do this including the following:
-
Open your My Contacts view. See Managing Your Contacts.
-
Use one of the searches to find a list of contacts that meet your criteria. See "Finding Information" on page 1.
-
Open a list such as a contact type, marketing list, or working list. See "Lists" on page 1.
-
Open the contact list for a matter, opportunity, or engagement.
-
-
If you want the report to include just a subset of contacts, select the contacts by selecting the check box next to each contact. If you want to include just one contact, highlight the contact in the list.
-
Choose View > Reports or select the Reports link. The Report Chooser displays the list of contact reports available to you.
-
Select the report you want to view.
If necessary, you can filter the list of reports to show just those applicable to people, companies, or both. Choose the type of contact from the Reports for drop-down list.
-
Adjust the Contacts Included as needed. For more information, see Selecting the Contacts to Include.
-
If the report can be personalized, choose the Personalize link and make any changes to the report settings.
-
Choose View Now. Alternatively, to send the report to yourself in an email, choose Send to Me.
For details, see Emailing Reports .
-
Once you have opened the report in the appropriate application (Acrobat Reader, Microsoft Excel, etc.), you can print the report as you would any other document in that application.
View or Print a Contact Report from the Contact Overview Page
You can also print a report for a contact from the Company Overview or Person Overview page. This includes just the one contact by default, although you can change the contact if necessary.
-
Display the overview page for the contact.
-
Choose View > Reports or select the View Reports link from the Actions area. The Report Chooser displays the list of contact reports available to you.
-
Select the report you want to view.
If necessary, you can filter the list of reports to show just those applicable to people, companies, or both. Choose the type of contact from the Reports for drop-down list.
-
If necessary, change the contact to include in the Contacts Included area.
-
If the report can be personalized, choose the Personalize link and make any changes to the report settings.
-
Choose View Now. Alternatively, to send the report to yourself in an email, choose Send to Me.
For details, see Emailing Reports .
-
Once you have opened the report in the appropriate application (Acrobat Reader, Microsoft Excel, etc.), you can print the report as you would any other document in that application.
Print All the Profiles for a Specific Contact
The profiles for a contact frequently include useful information about the contact, such as details about the contact as a client. You can print all of the profiles at once in a single report.
-
Display the Profiles dialog box for the contact.
There are multiple ways to do this, including the following:
-
From the Overview page, choose View > Profiles. Alternatively, choose the View Full Profiles link in the Profiles area.
-
Select the contact from a grid and choose View > Profiles.
-
-
Choose the View Printable Version link. The Web Client displays a report showing all of the profile information for the contact.
-
To print the information, choose the Print link.
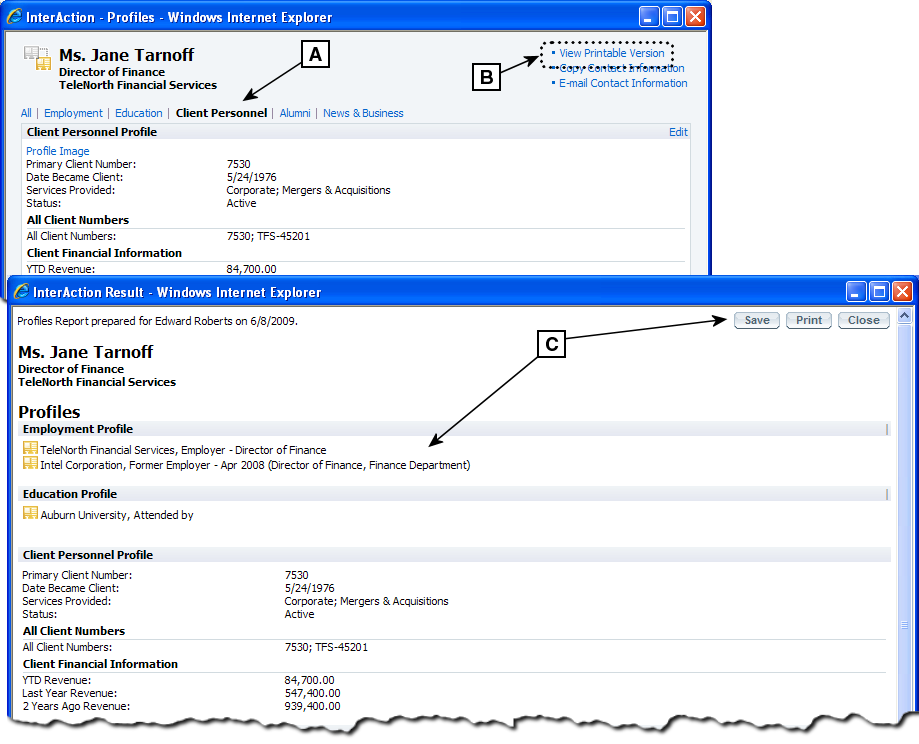
Viewing a Printable Version of a Contact's Profiles
[A] The Profiles dialog box displays all the profiles for a contact in these sections.
[B] Choose View Printable Version.
[C] The Profiles report that displays includes information from all of the profiles. From here, you can save a copy of the report or print it.
Print All Phones and Addresses for a Specific Contact
The View Contact dialog box displays the contact’s phones and addresses. This includes both the firm’s version and your version of this information. You can view a printable version of this information from the dialog box.
-
Display the View Contact dialog box for the contact.
There are multiple ways to do this, including the following:
-
From the Overview page, choose View > Contact. Alternatively, choose the All Phones and Addresses link.
-
Select the contact from a grid and choose View > Contact or choose the contact icon for the contact.
-
-
Choose the View Printable Version link. The Web Client displays a report showing all of the phones and addresses for the contact.
-
To print the information, choose the Print link.
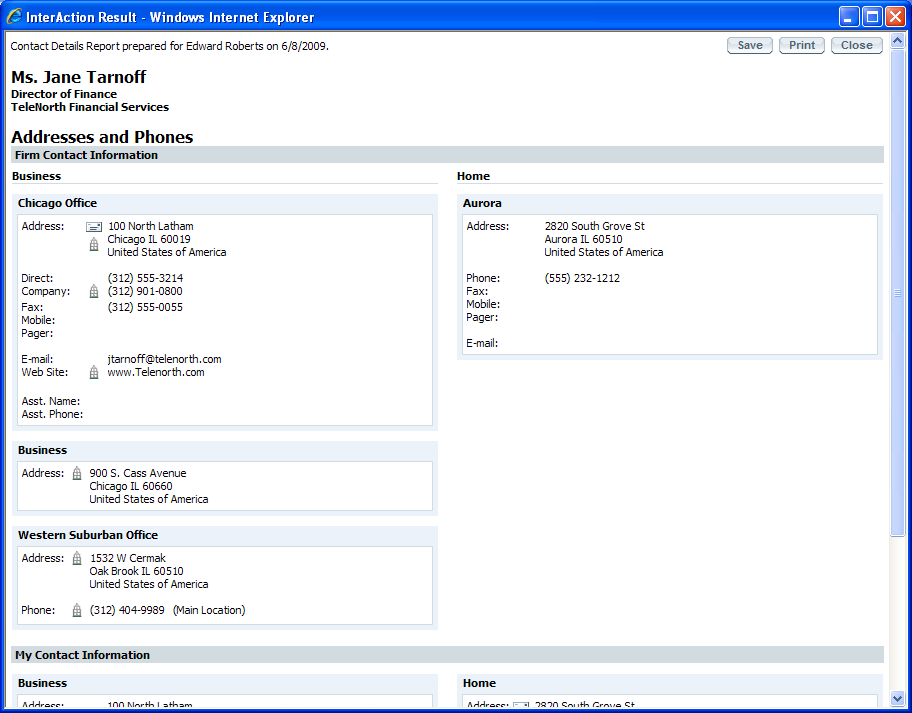
Printable Version of the Contact's Phones and Addresses