Section Topics
Creating and Editing Marketing Lists
You must use the Windows Client to create marketing lists.
- Create a Marketing List
- Edit a Marketing List
Create a Marketing List
For more information about the fields you set when creating a marketing list, see the Configuring InterAction guide.
TIP If you will be creating several similar marketing lists, you may want to set up a folder template. For details, see Folder Templates for Marketing Lists.
Do the following steps:
-
Log on to InterAction Windows Client.
-
Choose Folder > New > Marketing List to display the Select Marketing List Template dialog box (if applicable).
-
The Marketing List Template dialog box only appears if you have defined templates specifically for marketing lists. For details, see Folder Templates for Marketing Lists.
-
If you want to use a template, select the template and choose OK. Otherwise, select <None> and choose OK.
Since many marketing lists use similar additional fields, access rights and other settings, templates can be very useful.
-
-
In the New Marketing List dialog box, enter the Name and Description.
The description for a marketing list appears in a few places in the Web Client:
-
On the Marketing List page when a user selects the list.
-
On the page for viewing all the marketing lists in which a particular contact has been included.
-
-
Choose the marketing list Type. This determines whether the list uses sponsorship. The types are also used to organize the list of marketing lists on the Marketing List page in the Web Client:
To Do This To create a list that uses sponsorship Select Marketing List (with sponsorship). To create a list that does not store sponsorship information Select Marketing List (no sponsorship) or any other type. For more about sponsored and unsponsored marketing lists, see Overview of Marketing Lists. Also note that you will only see folder types you have permission to use. For details, see the Configuring InterAction guide.
-
If you want to use Data Change Management to control submissions to the new list, select the Data Change Management tab and configure the settings. For details, see Data Change Management for Marketing Lists.
-
Select the Options tab.
-
Select any of the options on the Options tab as needed.
-
Choose whether the folder can contain people, companies, or both.
-
Select the check box if this folder normally contains a large number of contacts. If this option is selected, when you open this folder in the Windows Client, InterAction only displays a subset of the entire folder and you can use the letter bar to change which contacts are displayed. This option is useful for very large lists that will be primarily managed by Windows Client users.
-
Select the check box if this folder supports flagging. If you want to change the meanings of any of the colors, select the flag in the list, choose Edit, and enter a new description.
-
If you want to automatically flag all new contacts added to the folder, select the color you want to use for all new contacts, choose Edit, and select the Flag new contacts check box.
-
Select the check box if Contacts sourced in this folder are audited. If you select this option, InterAction tracks changes to global data for contacts stored in this folder as part of the audit trail. You can only view the audit trail in the Windows Client.
-
-
Choose OK. InterAction opens the Edit Marketing List dialog box for the new marketing list. You can then add access rights and other settings.
-
When you create the new list, you are assigned as the folder owner and granted folder administration rights.
-
If you did not use a template, the new marketing list will not have any additional fields or access rights (other than for you).
-
For more information, see Edit a Marketing List.
-
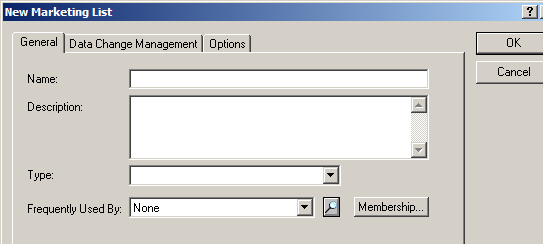
New Marketing List: General Tab
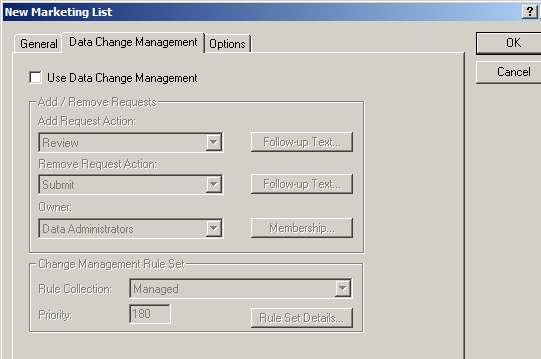
New Marketing List: Data Change Management Tab

New Marketing List: Options Tab
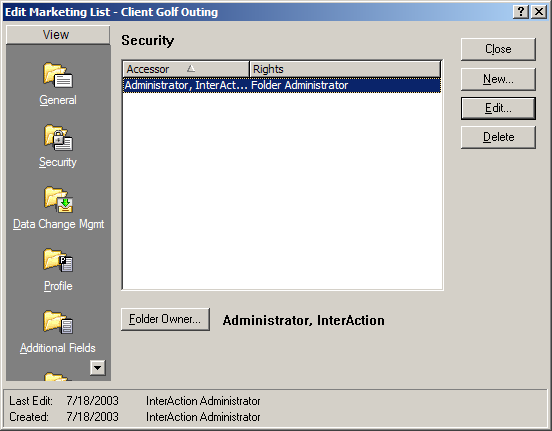
Edit Marketing List Dialog Box
Edit a Marketing List
Note that InterAction automatically opens the Edit Marketing List dialog box when you create a new marketing list. This is so that you can assign access rights, additional fields, and other settings to the list.
-
To edit a marketing list, select it and choose Folder > Edit Folder to display the Edit Marketing List dialog box.
-
In the list of views on the left, choose the item for the information to edit.
Use This Section To Edit the Following... General Name, Description, and Type.
For details, see the Configuring InterAction guide.
Security Access rights for the list.
For details, see Access Rights for Marketing Lists.
Data Change Management Rules for using Data Change Management on the list.
For details, see Data Change Management for Marketing Lists.
Profile Values for folder profile fields. This only appears in systems upgraded from InterAction 4.x. Additional Fields Additional fields for the marketing list.
For details, see the Configuring InterAction guide.
Classifications Classifications for the marketing list. These do not appear in the Web Client and should not be used. Options Edit the same options that are available on the Options tab from the new folder dialog box.
For details, see the Configuring InterAction guide.
-
When you are finished editing the marketing list, choose either OK or Close (depending on which section you are viewing).
Folder Templates for Marketing Lists
Folder templates simplify the process of creating marketing lists (and other folders) with similar characteristics. When you create a folder using a folder template, the new folder inherits the following from the template:
- The folder class and folder type. Note that templates depend on the folder class - for example, a template for marketing lists cannot be used with administrative folders.
-
The attributes from the Options tab of the New Folder dialog box:
-
Whether new contacts added to the folder can be people, companies, or both.
-
Whether the folder normally contains a large number of contacts.
-
The folder flagging options.
NOTE For details about these options, see the Configuring InterAction guide.
-
-
Access Rights
-
Additional Fields
-
Classifications
Folder templates only establish the initial or default set of values for a folder. You can change any of the values of the folder once the folder has been created using the template. Changes to a template (including deleting the template) do not affect existing folders that were created using the template.
Templates are only used in the Windows Client. Users creating working lists in the Web Client do no have access to folder templates.
Only users that have been granted permission from the system administrator can manage folder templates.
Folder templates are most useful for the marketing folders, since new mailings and events usually require new folders, and most of them will share the same basic characteristics.
For more information, see the following:
- Set Permission for Users to Create Folder Templates
- Create a Folder Template
- Edit a Marketing List Template
- Delete a Marketing List Template
Set Permission for Users to Create Folder Templates
-
Log on to InterAction Administrator.
-
From the main window entity list, double-click Configuration.
-
Select the Permissions tab.
-
Select the user or group that should be allowed to manage a folder template.
Setting Result Everyone Anyone can create and edit folder templates for any folder type they have permission to use. System Administrator Only Only the System Administrator User can create templates. Specific Group Only members of the group can create and edit folder templates for the folder types they have permission to use. -
Choose OK to close the Configuration dialog box.
Create a Folder Template
-
Log in to InterAction Windows Client.
-
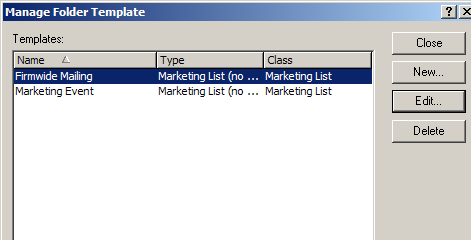
Choose Folder > Templates to open the Manage Folder Template dialog box.
-
Choose New to open the New Folder Template dialog box.
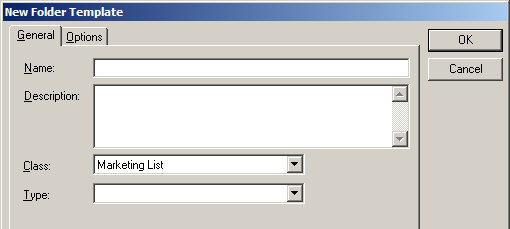
-
Enter the folder template Name and Description.
-
Choose Marketing List from the Folder Class drop-down list.
These are only used when selecting the template.
-
Choose the marketing list Type. This determines whether lists created from the template use sponsorship. The types are also used to organize the list of marketing lists on the Marketing List page in the Web Client.
To Do This To create a template for a list that uses sponsorship Select Marketing List (with sponsorship). To create a template for a list that does not store sponsorship information Select Marketing List (no sponsorship) or any other type. For more about sponsored and unsponsored marketing lists, see Overview of Marketing Lists.
-
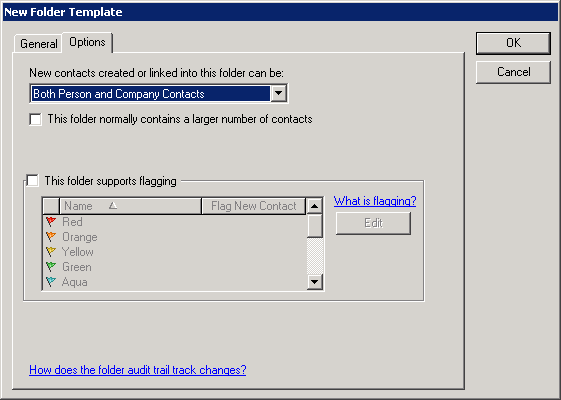
Select the Options tab.
-
Select any of the options on the Options tab as needed. These will be the default settings for marketing lists created using the template.
-
Choose whether the folder can contain people, companies, or both.
-
Select the check box if this folder normally contains a large number of contacts. If this option is selected, when you open this folder, InterAction only displays a subset of the entire folder and you can use the letter bar to change which contacts are displayed.
-
Select the check box if you want to allow public access to profile data. If you check this option, users without Read access to the folder can see the profile fields on the Folder Properties dialog box.
-
Select the check box if this folder supports flagging. If you want to change the meanings of any of the colors, select the flag in the list, choose Edit, and enter a new description.
-
If you want to automatically flag all new contacts added to the folder, select the color you want to use for all new contacts, choose Edit, and select the Flag new contacts check box.
NOTE When creating a template, these options become the default settings for any folders that are created using the template. Once you create a folder based on a template, you can change any of these settings for that individual folder.
-
-
Choose OK to save the marketing list folder template and close the dialog box.
You must edit the marketing list folder template to create the template’s access rights, additional fields, and classifications.
Edit a Marketing List Template
-
Log in to InterAction Windows Client.
-
Choose Folder > Templates to open the Manage Folder Template dialog box.
-
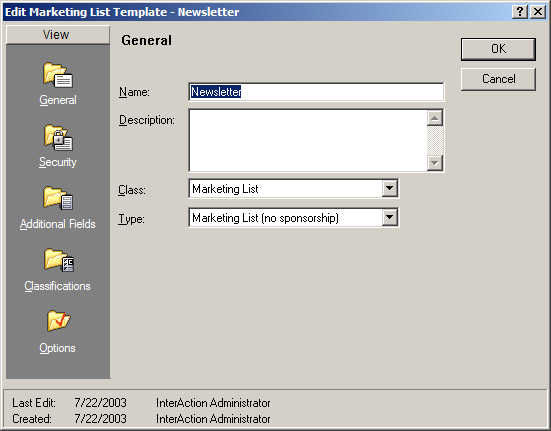
Select the folder template and choose Edit to open the Edit Folder Template dialog box.
-
To edit each area of the template, select the “view” from the left side of the dialog box, then edit the information.
To Do This Edit information such as name, description, and folder class or type. Select the General view, then edit the fields. Edit the default access rights that will be used for folders created using the template. Select the Security view. Edit the folder-specific additional fields that will be assigned to new folders created using the template. Select the Additional Fields view. Edit the folder-specific classifications that will be assigned to new folders created using the template. Select the Classifications view. Edit the other options for folders created using the template. Select the Options view. For more details, see the Configuring InterAction guide.
-
When you have finished editing the template, choose either OK or Close (depending on the view you are using) to close the Manage Folder Template dialog box.
Delete a Marketing List Template
Deleting marketing list templates does not affect any existing folders that were created with the template.
-
Log into InterAction Windows Client.
-
Choose Folder > Templates to open the Manage Folder Template dialog box.
-
Select the marketing list folder template and choose Delete.
-
Choose Yes to confirm that you want to delete the template.
-
Choose Close to close the Manage Folder Template dialog box.