Section Topics
Creating or Editing Automated Export Forms
Before you can create an automated export form, you must create several components for the form. For details, see Overview of Creating Automated Exports.
-
Open the folder that contains the contacts to export.
-
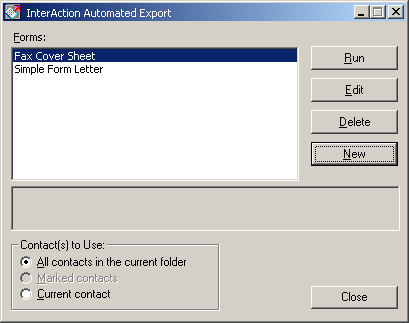
Choose Services > Automated Export to open the InterAction Automated Export dialog box. Any available export forms appear in the Forms list.

-
Choose to create a new form or edit an existing form.
-
To create a new form from scratch, choose New.
-
To edit an existing form, select the form, and choose Edit.

-
-
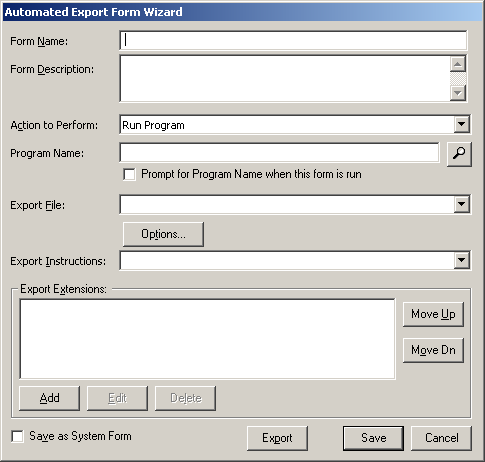
In the Form Wizard, enter the form name. If you are editing the form, you cannot change the name.
TIP Remember that users will identify the export by the form name and description. You should make both as descriptive as possible.
-
Enter or edit the Description for the form.
-
Select the Action to Perform from the list of actions.
For descriptions of the actions supplied with Automated Export, see Using Actions in Automated Export.
-
Depending on which action you chose, enter the appropriate information in the Merge Document field.
If You Chose Then Enter Mail Merge The full path to the merge document in the Merge Document box. Alternately, you can select Prompt for Merge Document when this form is run. Run program The full path to the program you wish to run in the Program Name box. Alternately, you can select Prompt for Program Name when this form is run. Display message Enter the text you wish to display in the Message Text box. Alternately, you can select Prompt for Message Text when this form is run. TIP Selecting Prompt for Merge Document when this form is run allows you to easily set up a generic set of instructions for mail merges. If you have several merge documents that all use the same export instructions, this can make it much easier to perform one-off mail merges.
NOTE You must enter the full path and filename for any files or programs that you enter or choose the Lookup button (
 ) to browse for the file.
 -
Select the Export File from the list. The list contains all export files found in the Data directory. You can also enter the name of an export file.
To change the regional settings for your export (if you need to change the date and numeric formats to a different country’s settings), choose the Options button to specify output options for the type of file selected. See International Options for Export for more information.
-
Select the Export Instructions from the list.
-
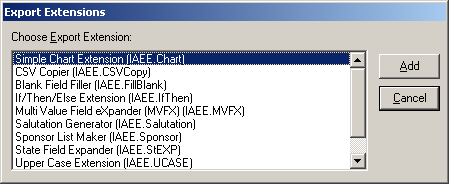
To configure export extensions for the form, choose Add. For instructions on how to configure Export Extensions see Export Extensions.

-
If you are creating a system automated export, select the Save as System Form check box.
-
When finished, choose Save.
Running a Program and Opening a File
If you choose to use the Run a Program action when creating a new automated export, InterAction will export the data and open the program. It will not open a file, nor will it populate a file in the program with InterAction data. You can, however, specify a file to open in the program. For example, you can run Microsoft Excel and open an Excel spreadsheet.
Run a Program and Open a File
-
Open a folder to export.
-
Choose Services > Automated Export to open the InterAction Automated Export dialog box. Any available export forms appear in the Forms list.
-
Choose to create a new form or edit an existing form.
-
To create a new form from scratch, choose New.
-
To edit an existing form, select the form, and choose Edit.
-
-
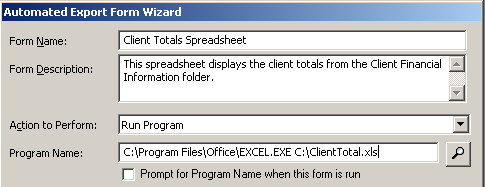
Complete the Name and Description fields.
-
On the Action to Perform field, select Run Program.
-
Choose your Export Instructions and your Export Data File.
-
On the Program Name field, enter the name of the program you want to run (include the full path to the program).
-
On the same line as the program, enter the full path to the file you want to open. Be sure to enter one space between the program file name and the other file name.
Note: Do not use the Browse button. If you use the Browse button to enter the file name, it will replace the path to the program name with the path to the document.

-
Continue creating the automated export and choose Save to save it.
