Section Topics
Managing User Proxies
Any user can have an administrative assistant, secretary, or other InterAction user as his or her proxy. Setting a user as a proxy does the following:
- Provides the proxy with access to the user’s contact list.
- Lets the proxy create and edit contact information on behalf of the user. For example, in the Web Client, a proxy can update a phone number in the user’s contact list. Proxies can also update other information on behalf of the professional. The proxy can act completely on behalf of the professional in the Web Client without requiring any special access rights.
- Lets the proxy manage any actionable items for the user. For example, the proxy can add a user contact to the firm list, contribute contacts, handle potential duplicate contacts, or provide more information for a contact added to the firm list.
- Lets the proxy set the user as the sponsor for a contact on a marketing list. Note, the proxy must have read access rights to the marketing list folder.
- Lets the proxy create activities on behalf of the user and set the user as the originator of the activity.
To prevent a proxy from seeing a contact in the user’s contact list, the user can designate the contact as Private. The private designation applies to the contact and all of the contact’s information.
A user can have an unlimited number of proxies.
Administrators can manage a user’s list of proxies from within InterAction Administrator. An individual user can also manage his or her proxies using the My InterAction page in the Web Client.
Add a Proxy for a User
Perform the following steps to add proxies to the selected users.
-
Log on to InterAction Administrator.
-
From the main window entity list, double-click User Account and Group Configuration. Then choose User Accounts to open the Manage User dialog box.
-
Mark the users you want to change from the list.
The users you want to edit may not display if they do not match the criteria of the selected filter. You can filter users by Status and by group membership.
-
From the Action drop-down list, select Add proxies and choose Apply. This opens the Select Users dialog box.
-
Mark the users who will act as proxies for the previously selected users.
Use the Filter drop-down list to filter the users by group. Use the Show Inactive Users link to include inactive users on the list.
-
Choose OK to apply your changes and close the dialog box.
-
From the Manage User dialog box, double-click on one of the users that you modified.
-
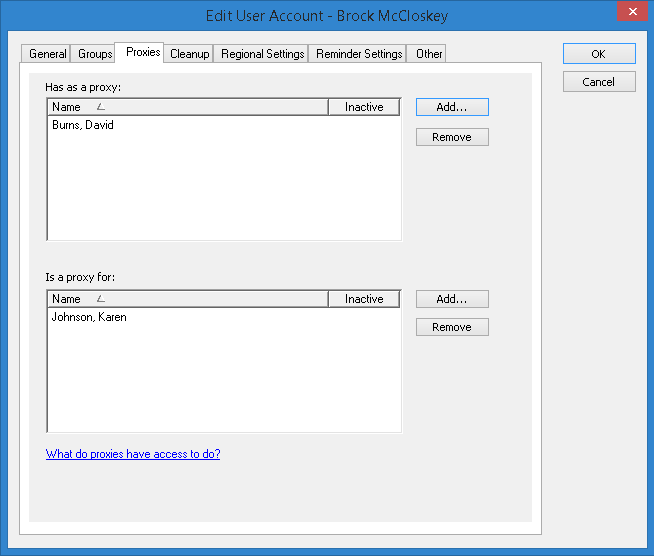
Choose the Proxies tab to view proxy information. From this tab you can see who is a proxy for the selected user as well as who the selected user proxies for.
Set as a Proxy for a User
Perform the following steps to make the selected users proxies for other users.
-
Log on to InterAction Administrator.
-
From the main window entity list, double-click User Account and Group Configuration. Then choose User Accounts to open the Manage User dialog box.
-
Mark the users you want to change from the list.
The users you want to edit may not display if they do not match the criteria of the selected filter. You can filter users by Status and by group membership.
-
From the Action drop-down list, select Set as proxy for other users and choose Apply. This opens the Select Users dialog box.
-
Mark the users who will gain the previously selected users as proxies.
-
Choose OK to apply your changes and close the dialog box.
-
From the Manage User dialog box, double-click on one of the users that you modified.
-
Choose the Proxies tab to view proxy information. From this tab you can see who is a proxy for the selected user as well as who the selected user proxies for.
Remove a Proxy from a User or a User from a Proxy
-
Log on to InterAction Administrator.
-
From the main window entity list, double-click User Account and Group Configuration. Then choose User Accounts to open the Manage User dialog box.
-
Select the user you want to change from the list.
- The user you want to edit may not display if the user does not match the criteria of the selected filter. You can filter users by Status and group membership.
-
To change the current user filter, choose Filter, select the desired filter criteria, and choose OK.
-
Choose Edit to open the Edit User Account dialog box.
-
Choose the Proxies tab.
-
Either select the person that is a proxy for the current user or select the person that the current user is proxy for and choose Remove.
-
Choose OK to close the Edit User Account dialog box.