Section Topics
Managing Your Proxies
Administrators can use InterAction Administrator to manage the list of proxies for you. In addition, you can manage your own list of proxies using the Proxies option in My InterAction.
Setting Up Proxies in the Web Client
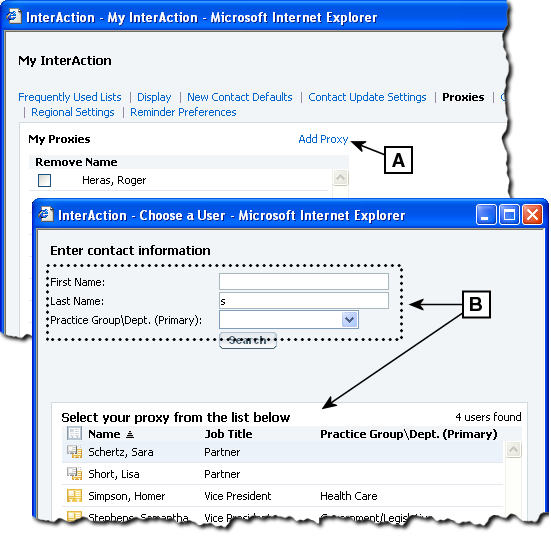
[A] Choose Add Proxy.
[B] Enter the search criteria and choose Search to display possible users in the list. Select the user you want as your proxy and choose OK.
Add a Proxy in the Web Client
Note: InterAction Administrators can also assign proxies for you.
-
From any main page, choose the My InterAction link.
-
Choose the Proxies link.
-
Choose Add Proxy.
-
Enter the name information (first and/or last) for the person you want to add as your proxy and choose Search.
-
Select the contact by highlighting the name and choose OK.
-
Choose Save to close the dialog box and save the new proxy.
Note that your new proxy is not saved unless you choose Save. You can make other changes to My InterAction settings if necessary, as long as you choose Save when finished.
Remove a Proxy in the Web Client
Note: InterAction administrators can also remove proxies for you.
-
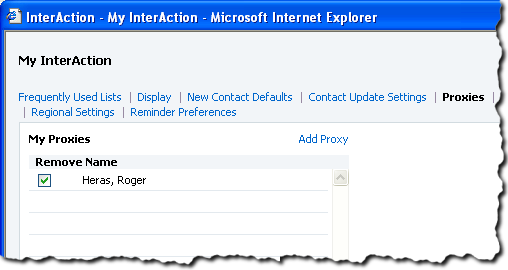
From any main page, choose the My InterAction link.
-
Choose the Proxies link.
-
Select the proxy name to be removed by checking the box.
-
Choose the Save button to complete. Your proxy has now been removed.