Section Topics
Setting Up Security (Viewing Rights) for Reports
You can specify viewing rights for the reports on your organization’s report list. Viewing rights are not only about report security, but also about reducing the number of reports users see on their report list in the Report Chooser. Reducing the number of reports to only what is necessary for each user to view makes a better reporting experience for the user.
If you have users at your organization that are not permitted to extract data out of InterAction, you should set security for these users.
Two options are available for each report:
- Security - Which users and/or groups are allowed to access the report. See Define Which Users Can Access a Report.
- Accessible From - For the users and/or groups that can access the report, the location where the report can be accessed. See Indicate Where a Report Can Be Accessed.
What Happens if a User Runs a Report that Includes Restricted Information?
Some reports may contain information that you don’t want accessible to the entire organization, for example financial information. It can be time consuming to set security for specific users who are not permitted to see that information.
If a user doesn’t have access rights to particular data, those fields are blank when the user runs the report. The headings for the fields display, but there is no data in those fields. For example, if a user runs a report that contains additional fields in a folder that he or she does not have access to, the report only contains headings for the additional fields, but the fields are blank.
Define Which Users Can Access a Report
Your administrator has created user accounts and groups in InterAction Administrator. Report managers decide which users can access a particular report by adding that user account or group to the user list in report security. By default, most out-of-the-box reports can be viewed by Everyone.
TIP If a report contains a lot of information and has the potential to be slow, you may want to limit it to only the people that need access to it. For example, a report that contains activities regarding all Matters, Opportunities, and Engagements does not have to be available to everyone.
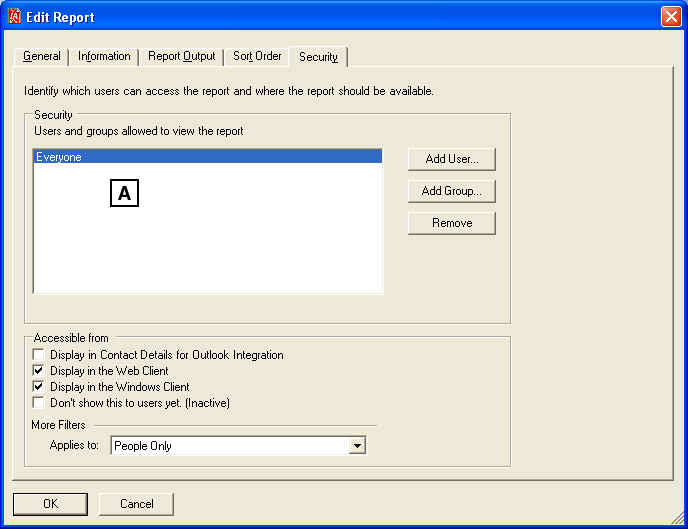
Report Security - List of Users and Groups
[A] The Security tab of the Edit Report dialog box lists all users and groups that are allowed to access the report.
To set up the users who can access a report:
-
In the InterAction Windows Client, choose Tools > Reports.
-
Choose Manage.
-
Highlight the name of the report then choose Edit.
-
Choose the Security tab.
-
To add a user or group, choose Add User or Add Group respectively, select the name of the user or group, then choose OK.
-
To remove a user or group, highlight that user or group then choose Remove.
Indicate Where a Report Can Be Accessed
Reporting users can access the Report Chooser in three locations: the Windows Client, Web Client, and the PIM. For each report, report managers can specify where the report can be accessed by users that have the rights to use that report.

Report Security - Access Options
[A] When this option is selected, users can access the report from Microsoft Outlook.
[B] When this option is selected, the report is available to print from the Report Chooser in the Web Client.
[C] When this option is selected, the report is accessible to Windows Client users.
Depending on what type of report you are setting up, not all check boxes are available. For example, if you are setting up an activity report, the Display in Contact Details in Outlook Integration and Display in the Windows Client check boxes are inactive because activity reports can only be printed in the Web Client.
TIP Reports run from Outlook are usually only run on one contact at a time. If a report should be run on several contacts at one time (for example, Contact List by Sponsor), consider making that report unavailable in Outlook.
To set up where the report is accessed:
-
In the InterAction Windows Client, choose Tools > Reports.
-
Choose Manage.
-
Highlight the name of the report then choose Edit.
-
Choose the Security tab.
-
Accessibility options are listed in the Security section of the Edit Report dialog box. Select any of the options to make them true.